

Overview
Thingsboard allows for different IoT connectivity methods including HTTP, MQTT, etc. You can easily create advanced monitoring dashboards for your IoT devices or device gateways. One of the advanced features of Thingsboard is that the platform is open source and it allows for local server setup. In this guide we will be looking at working with the cloud version of thingsboard platform, this implies that you don’t necessarily need to have a local server of thingsboard setup on your Linux or Raspberry pi Machine.
The Hardware needed
For this tutorial, we will be using the following materials:
- Raspberry pi (3, Zero, or newer)
- DHT11
- 10k ohm resistor
- Jumper wires
- Breadboard
The Hardware setup
Step 1: The very first step is to ensure that you can access your raspberry pi, you can use the link below to check how to set up your Raspberry pi in either headed or headless form.
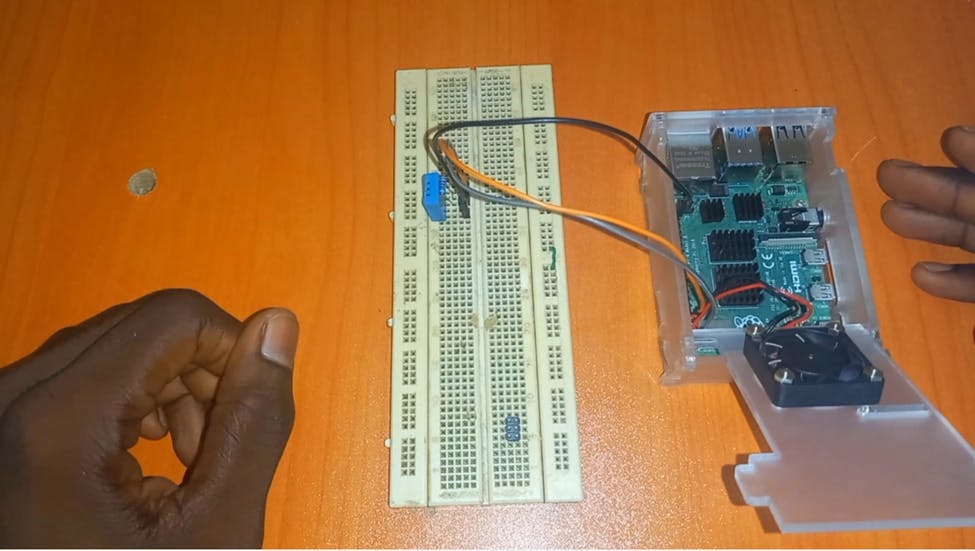
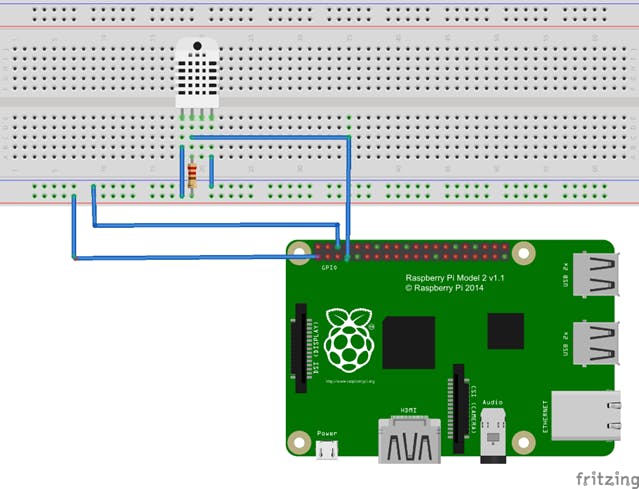
Step 2: Connect the DHT 11 to the breadboard, depending on your model of DHT 11, it can be a 3-pin ready-made model or a 4-pin model, in this tutorial, I am using a 4-pin model. If you are using a 3-pin model, connect the VCC to 3V of the Raspberry pi (PIN 1), GND of the DHT 11 to GND on the Raspberry pi (PIN 6), and connect the data pin to GPIO 4 (PIN 7) of the Raspberry pi. If it is the 4-pin model you are using, connect Pin 1 of the DHT11 to 3V of the Raspberry pi (PIN 1), connect the 10K resistor between pin 1 and pin 2 of the DHT 11 and again connect pin 2 of the DHT11 to GPIO 4 (PIN 7) of the Raspberry pi, leave pin 3 of the DHT 11 sensor unconnected and connect pin 4 of the DHT 11 to GND on the Raspberry pi (PIN 6).
Circuit Diagram
Reading DHT sensor Data on your Raspberry Pi
Unlike Arduino or other related boards that have support for DHT sensors straight out of the box, we need to set up our Raspberry pi first to be able to read data from the DHT sensor. Before we can send the data to Thingaboard Cloud, we need to be able to read the data from the DHT11 sensor.
Step 1: Installing CircuitPython Libraries on Raspberry Pi
Update your Raspberry pi by running the standard updates and downloading dependencies
sudo apt-get update
sudo apt-get upgrade
sudo apt-get install python3-pip
sudo pip3 install --upgrade setuptools
Adafruit put together a script to easily make sure your Pi is correctly configured and install Blinka. It requires just a few commands to run. Most of it is installing the dependencies.
cd ~
sudo pip3 install --upgrade adafruit-python-shell
wget https://raw.githubusercontent.com/adafruit/Raspberry-Pi-Installer-Scripts/master/raspi-blinka.py
sudo python3 raspi-blinka.py
If your system default Python is Python 2 (which is likely on a first install), it will ask to confirm that you want to proceed. Choose yes. It may take a few minutes to run. When it finishes, it will ask you if you would like to reboot. Choose yes. Once it reboots, the connection will close. After a couple of minutes, you can reconnect.
Step 2: Installing the CircuitPython-DHT Library
You'll also need to install a library to communicate with the DHT sensor. Since we're using Adafruit Blinka (CircuitPython), we can install CircuitPython libraries straight to our small Linux board. In this case, we're going to install the CircuitPython_DHT library. This library works with both the DHT22 and DHT11 sensors.
Run the following command to install the CircuitPython-DHT library:
pip3 install adafruit-circuitpython-dht
sudo apt-get install libgpiod2
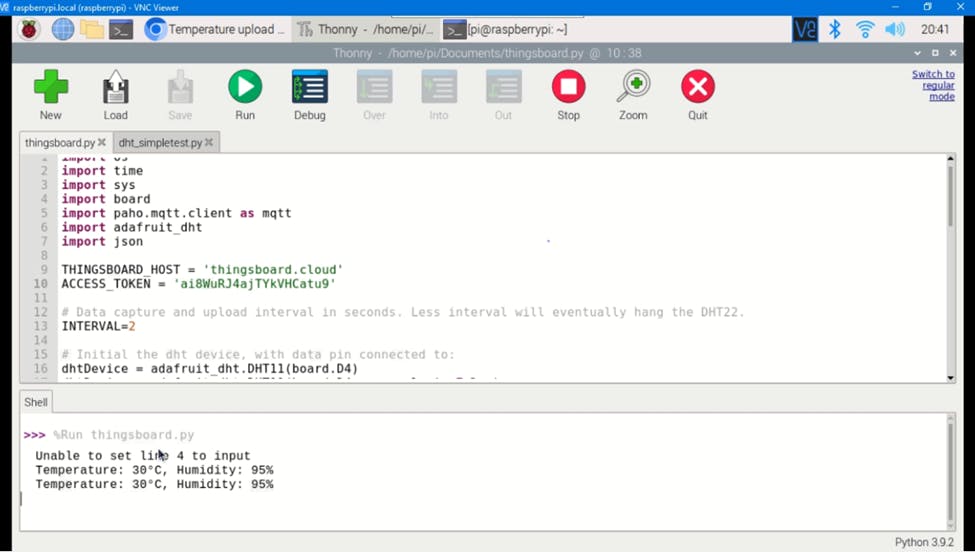
Step 3: Testing the DHT Library
To test the working of the DHT11 download the code from this repository
If you are able to set it up correctly, running the code should give you an output as below:

Setting up Thingsboard Cloud
Step 1: There are three different methods of setting up the Thingsboard IoT platform, the first is to use the Thingsboard Local server meaning that you can set up Thingsboard to work locally on your Raspberry pi, the second method is to use the Thingsboard cloud meaning you can use internet connectivity to send your IoT data to the Thingsboard Cloud and the last method is to use the Thingsboard Live Demo. In this guide, we will be looking at how to use Thingsboard Cloud.
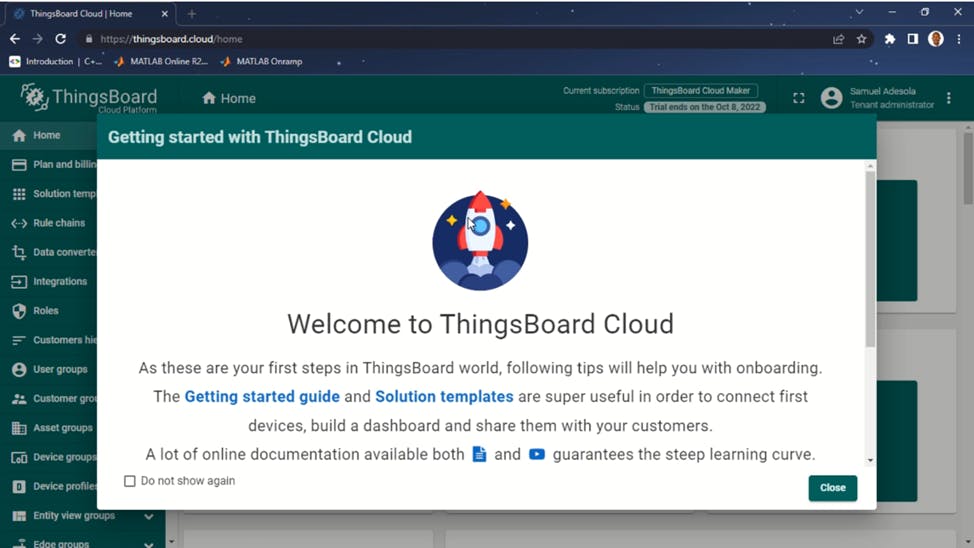
To access the Thingsboard cloud, open up a web browser and search for https://thingsboard.cloud if you are new to Thingsboard, you will have to create an account and if you already have an account, you can proceed to follow along in this guide. You can click on Close to close the Getting Started message.
Step 2: There are quite lots of options available to you on the platform depending on your IoT Solution requirements, you can also navigate through the platform using the tabs or the left pane. What you want to do is to create a device and that’s majorly what we will be doing. To create a device, you have two options but they all point to the same thing. You can use the tabs and click on Devices or select Device groups from the left pane. Device groups are ways of grouping related IoT devices together so they can be easily monitored in your Thingsboard platform. By default in Thingsboard, a device group name All will be created for you, you can choose to just stick to this or create a new one for your devices.
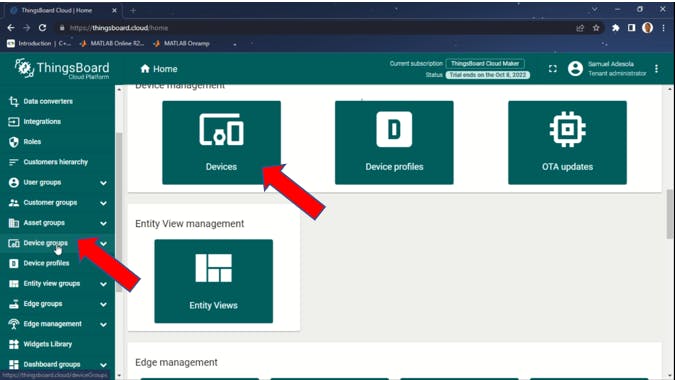
After clicking the Devices button, you will be directed to the Devices group page. Here will be adding a new device to the default device group All.
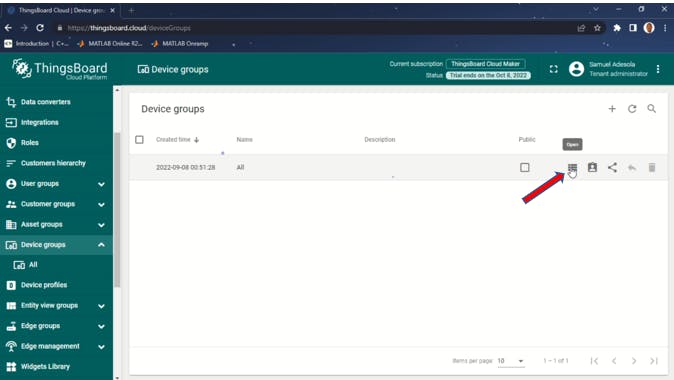
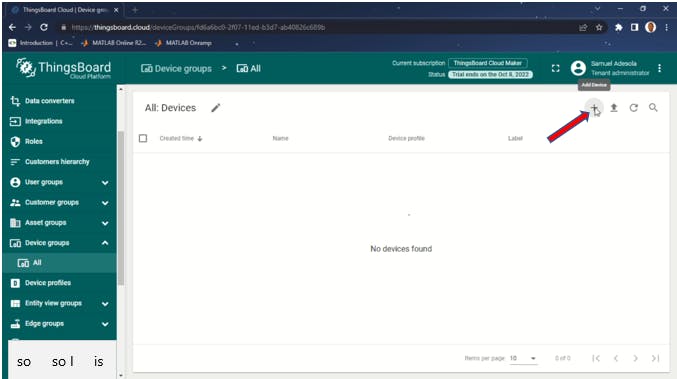
To add a new device to the All group, click on the Open button in front of the All option. The All device group will open and we will add a new device to it. To add a new device, click on the + icon at the top right.
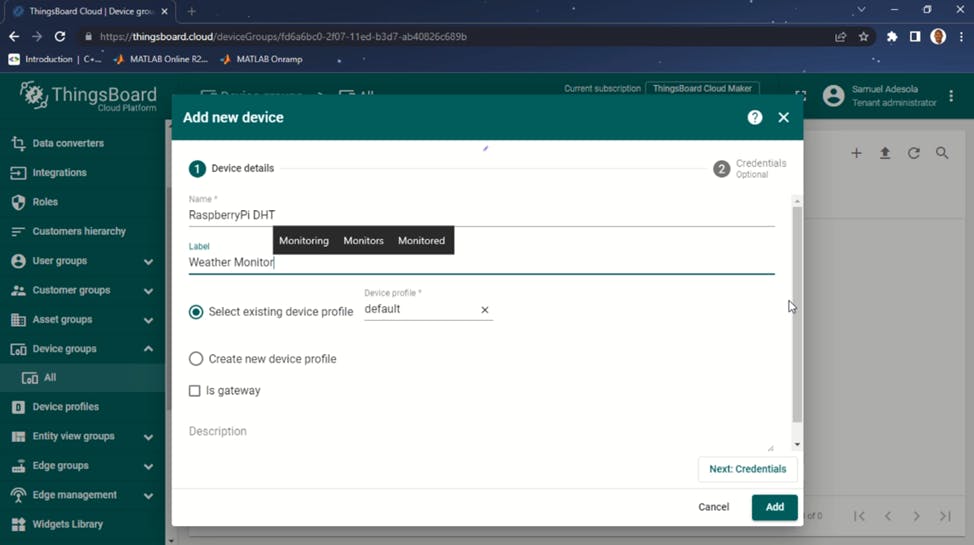
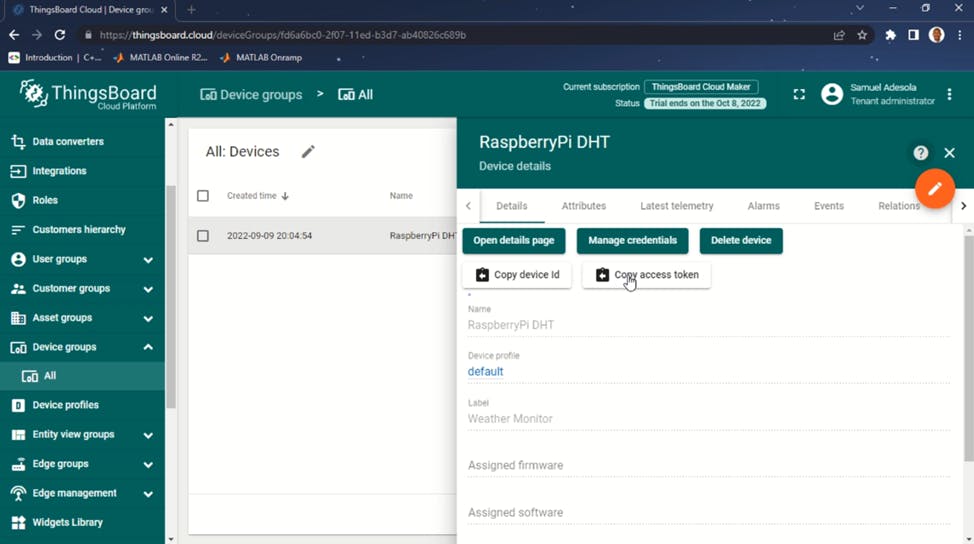
Type in the name of your device, the Label is optional but you can fill out a little description of your device. Once you’re done filling this, click on Add
With this, you are done creating a device under the device group All. If you click on the device that was just created, you will have access to the device settings and also a button to copy the Device Access Token.
Final Integration
After setting up your hardware and setting your Raspberry pi to read DHT 11 sensor data, the next thing is to set up Raspberry pi to send DHT11 sensor data to Thingsboard cloud. Since the protocol of communication is MQTT, we have to download the python module support for the protocol on the raspberry pi, to get this done, open the terminal and type in the command
pip3 install paho-mqtt.
After completing this, we can then run the code which is available in the project GitHub repository:
Change ACCESS_TOKEN to the token you copied from the device details page from the step above. Leave the THINGSBOARD_HOST as thingsboard.cloud.
Once you are done, you can click on the Run the code and if you are using thorny, you should see the results as shown below.
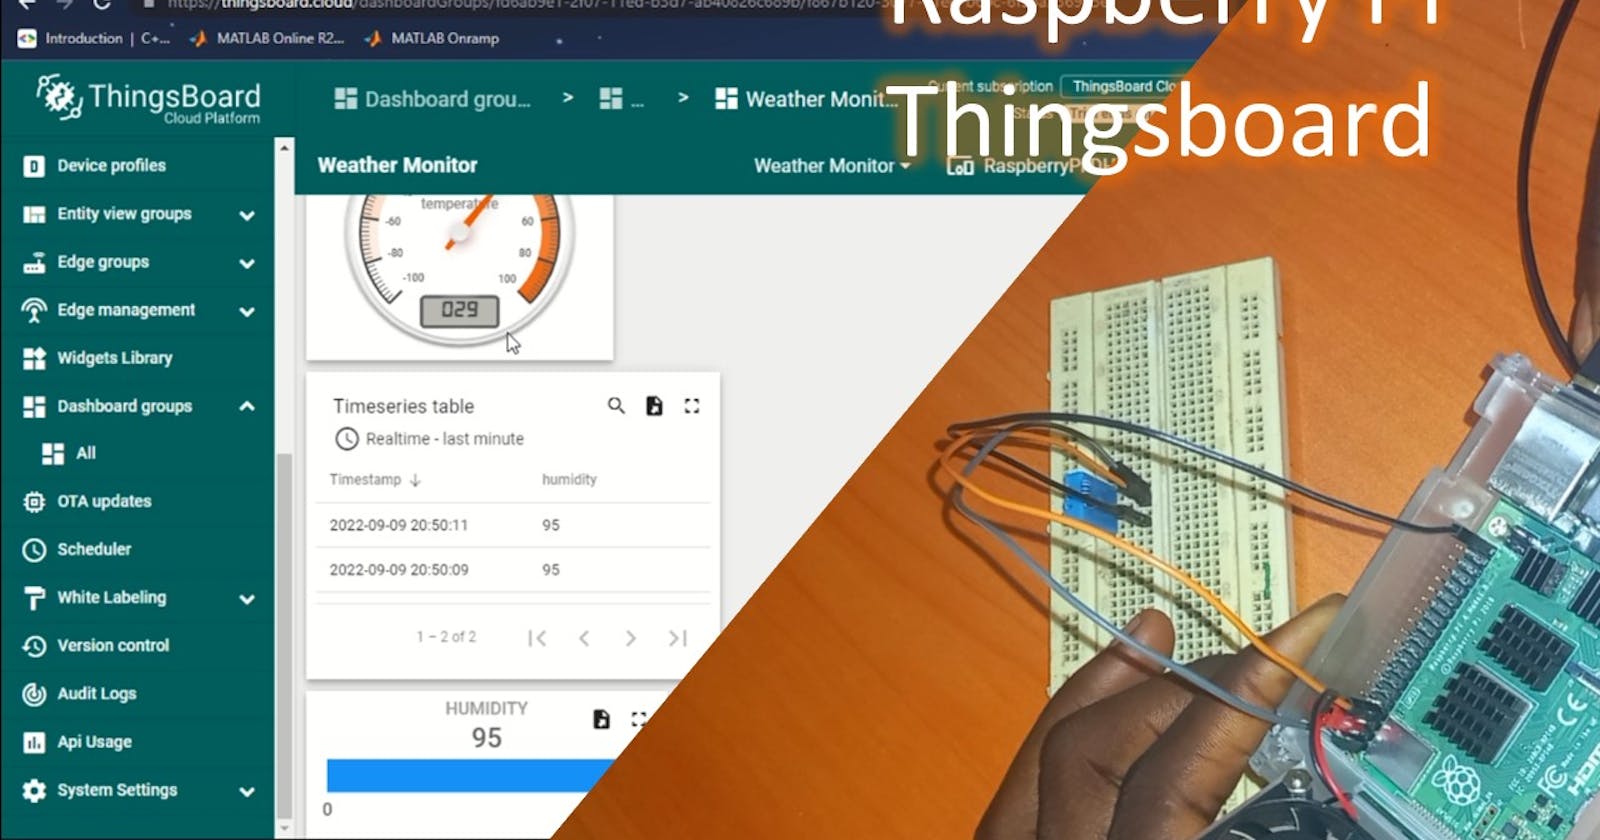
Data Monitoring
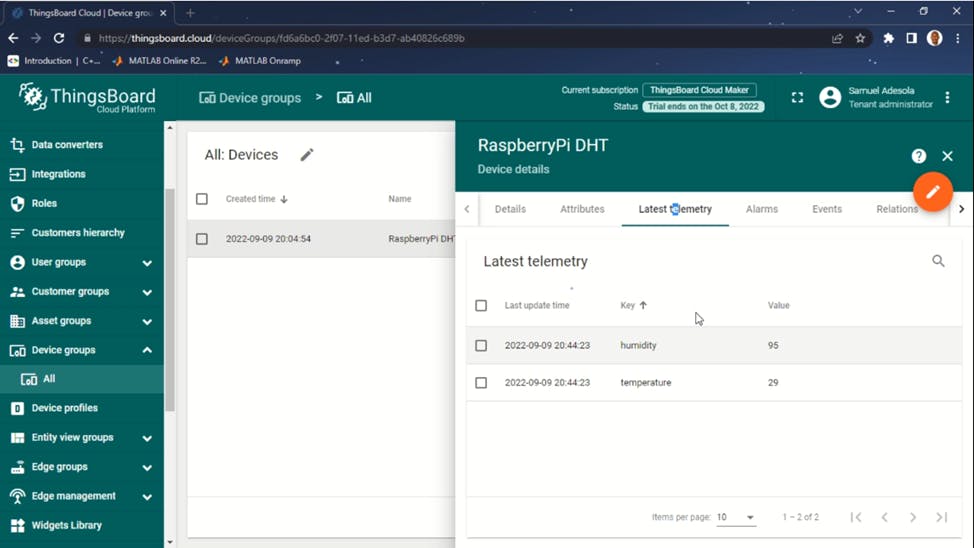
To create and view the data that are being sent in a dashboard, open the thingsboard tab again in your web browser, click on the device created and navigate to the Latest Telemetry tab. Here the latest telemetries sent from your Raspberry pi will be displayed (Not that only the last value will be shown).
Click on the temperature telemetry and click on the show on the widget.
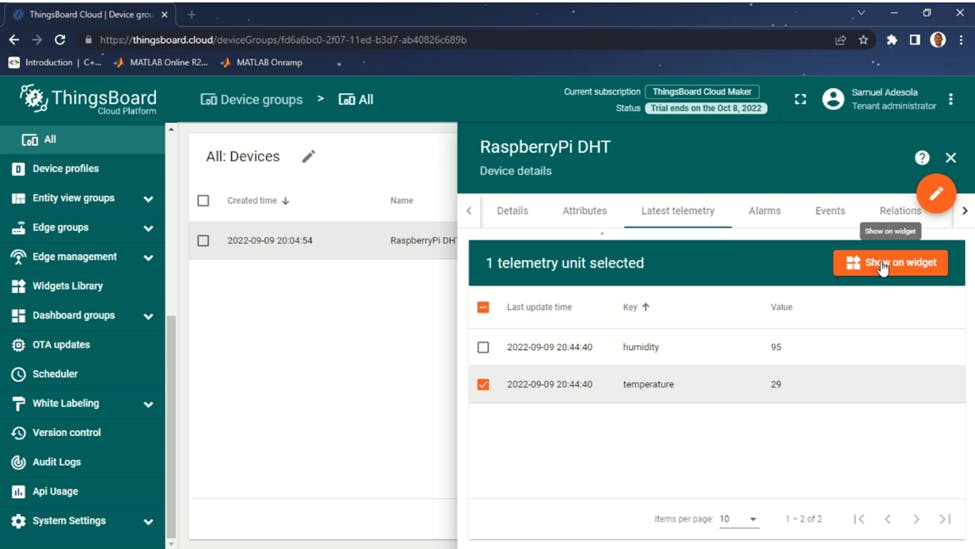
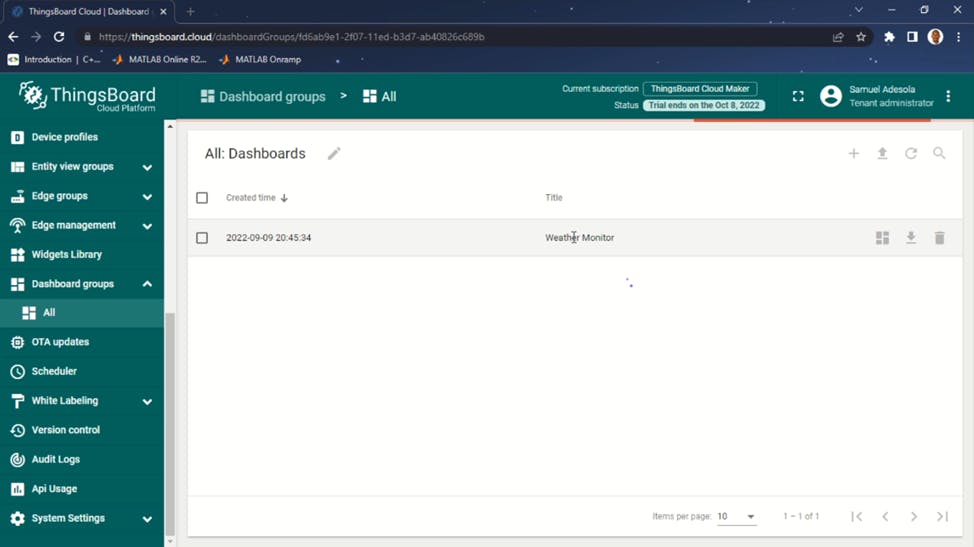
From the card drop-down option, select your chosen widget type and click on add to the dashboard. Now we don’t have a previous dashboard created so click on Create new dashboard, give it a name and click on Add. You can create as many widgets card as you want, repeat the same step for the humidity telemetry and you will have your dashboard created. (Note that while creating the second widget, just select the dashboard you created instead of creating another one) To view your dashboard, select Dashboard groups in the left pane, and you will have the All dashboard group, open it and you will see the dashboard you created
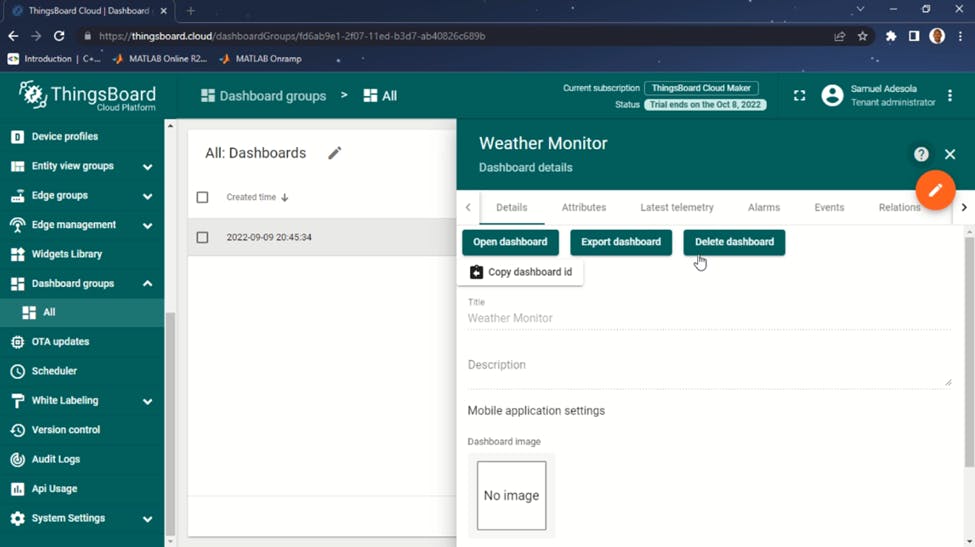
Click on the device and click on Open Dashboard.
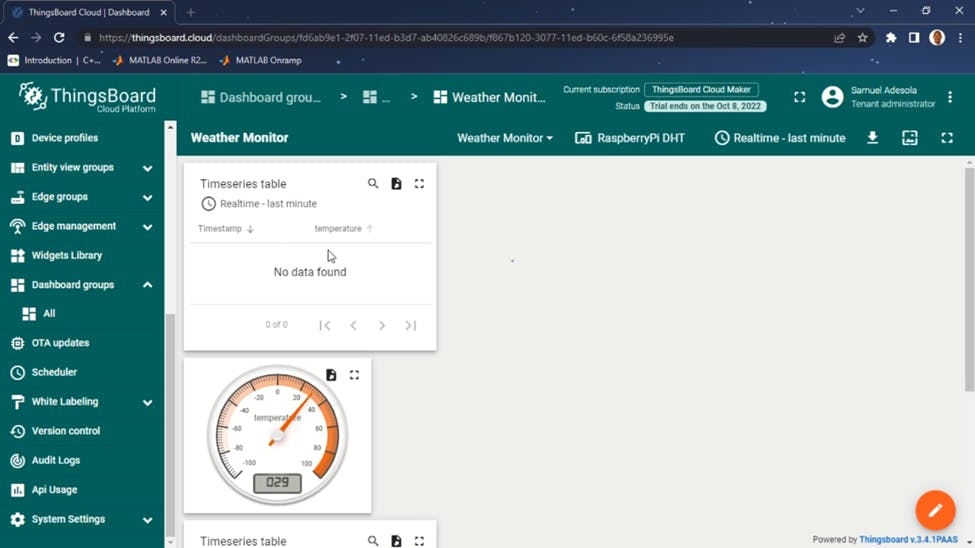
And with this, you have your Raspberry pi fully functional with Thinhsboard cloud.
Check the full guide on YouTube: youtu.be/TSjT0Hco5UY